With the introduction of WEB APIs in CRM2016, you can do all the things that you used to do using organization services (SOAP endpoints). It is good news but the greatest news for me is the addition of CORS support.
Remember the days when you could not use CRM REST endpoints for standalone applications because of CORS, now you can. According to the SDK, the new WEB API supports cross-origin web resource request when called using OAuth token authentication.This means that we can now create standalone and mobile applications using WEB API. The SDK contains a sample page to demonstrate this functionality. In this blog, I will follow that sample with some additional screenshots.
Here is the step by step guide to create a html page using CRM Web API. I am using CRM Online for this post.
Signup up CRM2016 online
Setup a 30 day free trial CRM2016 organization from the following link:
Creating the web application
-
Using Visual Studio 2015, create a new ASP.Net web application project.

-
Choose the “Empty” template.

-
Add a new HTML page to the project and name it “CreateAccounts”. Copy the following code and paste it into the HTML page.
<!DOCTYPE html> <html> <head> <title>Simple SPA</title> <meta charset="utf-8" /> <script src="https://secure.aadcdn.microsoftonline-p.com/lib/1.0.0/js/adal.min.js"></script> <script type="text/javascript"> "use strict"; //Set these variables to match your environment var organizationURI = "https://hpeaustralia.crm6.dynamics.com"; //The URL to connect to CRM Online var tenant = "hpeaustralia.onmicrosoft.com"; //The name of the Azure AD organization you use var clientId = "ef9166ae-8d3f-48c9-b260-243d29f15355"; //The ClientId you got when you registered the application var pageUrl = "http://localhost:39812/CRMAccounts.html"; //The URL of this page in your development environment when debugging. var user, authContext, message, errorMessage, loginButton, logoutButton, getAccountsButton, accountsTable, accountsTableBody; //Configuration data for AuthenticationContext var endpoints = { orgUri: organizationURI }; window.config = { tenant: tenant, clientId: clientId, postLogoutRedirectUri: pageUrl, endpoints: endpoints, cacheLocation: 'localStorage', // enable this for IE, as sessionStorage does not work for localhost. }; document.onreadystatechange = function () { if (document.readyState == "complete") { //Set DOM elements referenced by scripts message = document.getElementById("message"); errorMessage = document.getElementById("errorMessage"); loginButton = document.getElementById("login"); logoutButton = document.getElementById("logout"); getAccountsButton = document.getElementById("getAccounts"); accountsTable = document.getElementById("accountsTable"); accountsTableBody = document.getElementById("accountsTableBody"); //Event handlers on DOM elements loginButton.addEventListener("click", login); logoutButton.addEventListener("click", logout); getAccountsButton.addEventListener("click", getAccounts); //call authentication function authenticate(); if (user) { loginButton.style.display = "none"; logoutButton.style.display = "block"; getAccountsButton.style.display = "block"; var helloMessage = document.createElement("p"); helloMessage.textContent = "Hello " + user.profile.name; message.appendChild(helloMessage) } else { loginButton.style.display = "block"; logoutButton.style.display = "none"; getAccountsButton.style.display = "none"; } } } // Function that manages authentication function authenticate() { //OAuth context authContext = new AuthenticationContext(config); // Check For & Handle Redirect From AAD After Login var isCallback = authContext.isCallback(window.location.hash); if (isCallback) { authContext.handleWindowCallback(); } var loginError = authContext.getLoginError(); if (isCallback && !loginError) { window.location = authContext._getItem(authContext.CONSTANTS.STORAGE.LOGIN_REQUEST); } else { errorMessage.textContent = loginError; } user = authContext.getCachedUser(); } //function that logs in the user function login() { authContext.login(); } //function that logs out the user function logout() { authContext.logOut(); accountsTable.style.display = "none"; accountsTableBody.innerHTML = ""; } //function that initiates retrieval of accounts function getAccounts() { getAccountsButton.disabled = true; var retrievingAccountsMessage = document.createElement("p"); retrievingAccountsMessage.textContent = "Retrieving 10 accounts from " + organizationURI + "/api/data/v8.0/accounts"; message.appendChild(retrievingAccountsMessage) // Function to perform operation is passed as a parameter to the aquireToken method authContext.acquireToken(organizationURI, retrieveAccounts) } //Function that actually retrieves the accounts function retrieveAccounts(error, token) { // Handle ADAL Errors. if (error || !token) { errorMessage.textContent = 'ADAL error occurred: ' + error; return; } var req = new XMLHttpRequest() req.open("GET", encodeURI(organizationURI + "/api/data/v8.0/accounts?$select=name,address1_city&$top=10"), true); //Set Bearer token req.setRequestHeader("Authorization", "Bearer " + token); req.setRequestHeader("Accept", "application/json"); req.setRequestHeader("Content-Type", "application/json; charset=utf-8"); req.setRequestHeader("OData-MaxVersion", "4.0"); req.setRequestHeader("OData-Version", "4.0"); req.onreadystatechange = function () { if (this.readyState == 4 /* complete */) { req.onreadystatechange = null; if (this.status == 200) { var accounts = JSON.parse(this.response).value; renderAccounts(accounts); } else { var error = JSON.parse(this.response).error; console.log(error.message); errorMessage.textContent = error.message; } } }; req.send(); } //Function that writes account data to the accountsTable function renderAccounts(accounts) { accounts.forEach(function (account) { var name = account.name; var city = account.address1_city; var nameCell = document.createElement("td"); nameCell.textContent = name; var cityCell = document.createElement("td"); cityCell.textContent = city; var row = document.createElement("tr"); row.appendChild(nameCell); row.appendChild(cityCell); accountsTableBody.appendChild(row); }); accountsTable.style.display = "block"; } </script> <style> body { font-family: 'Segoe UI'; } table { border-collapse: collapse; } td, th { border: 1px solid black; } #errorMessage { color: red; } #message { color: green; } </style> </head> <body> <button id="login">Login</button> <button id="logout" style="display:none;">Logout</button> <button id="getAccounts" style="display:none;">Get Accounts</button> <div id="errorMessage"></div> <div id="message"></div> <table id="accountsTable" style="display:none;"> <thead><tr><th>Name</th><th>City</th></tr></thead> <tbody id="accountsTableBody"></tbody> </table> </body> </html> -
The highlighted part in the above code are the variables that needs to be set to make this code work properly. I have left my settings for those variables in the code. Please change the values of these variables to match your system.
-
Run the code. It will open a new browser window. Check the URL of that page. It will look something like http://localhost:3764/CrerateAccounts.html
-
Replace the value of the variable “pageUrl” with the your URL from step 5 above.


Note: The next heading “Register the application with windows Azure” will provide the value for the “clientId” variable of the code.
Register the application with windows Azure
-
If you don’t have a Windows Azure account then you can create a trial account attached to CRM Online domain by logging into Office 365. Go to step 10.

-
If you already have a Windows Azure subscription then you need to associate your Office 365 subscription (CRM online account) to the Windows Azure subscription. I already have an Window Azure subscription.
-
Logon to Azure portal account.
-
Click on “Active Directory” as shown in the following screenshot and click “New” to associate your Office 365 domain to Windows Azure.

-
Select “Custom Create” from the following screen

-
Select “Use existing directory” and tick “I am ready to be signed out”.

-
Login as the admin of your Office 365 (CRM Online) account. You will see the following message.

-
Click “Sign out now” on the following screen

-
Login to the Windows Azure portal again using your Windows Azure account. You will now see 2 active directories.
-
Click on the CRM directory, It will display the following screen.

-
Click on the "Applications" tab and select add, as highlighted in the following screenshot.

-
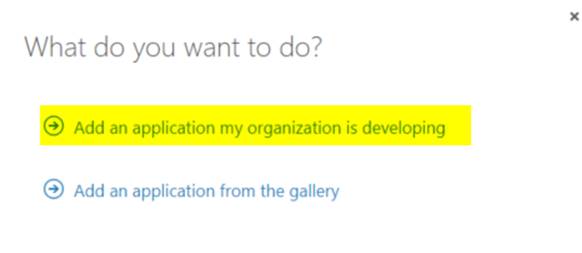
Select “Add an application my organization is developing”.


-
Enter the following information:
-
Sign-on URL
This is the URL which the user should be redirected to after they sign in. For debugging purposes in Visual Studio it should be http://localhost:####/CRMAccounts.html where #### represents the port number you got from step 4 of the Create a web application project procedure. These are the same values as step 5 of the “Creating the web application” section of the blog. -
APP ID URI
This must be a unique identifier for the application. Use https://XXXX.onmicrosoft.com/CRMAccounts . Where XXXX is the Active Directory tenant.

-
-
With the tab of the newly registered app selected, click "Configure" and locate the Client id. Copy the id and update the “clientId” variable of the web application.

-
Select “Add application” and choose “Dynamics CRM Online”.

-
Under permissions to other applications, you will find a row for "Dynamics CRM Online" and "Delegated Permissions: 0". Select this and add "Access CRM Online as organization users".

-
Save the application registration.
-
Click on “Manage Manifest” and select “Download Manifest”.

-
Manifest is a json file. Open the file and locate the line:
"oauth2AllowImplicitFlow": false,and change false to true and save the file.
-
Upload the manifest file.


Run the web application
-
Now go back to your web application and press F5 to run the page. It will open the page in the browser.
-
Click on login. The system will take you to the login page. The page will display the name of the logged in user.

-
Click on “Get Accounts”. The browser will display the following page.


That is it. Happy coding..


